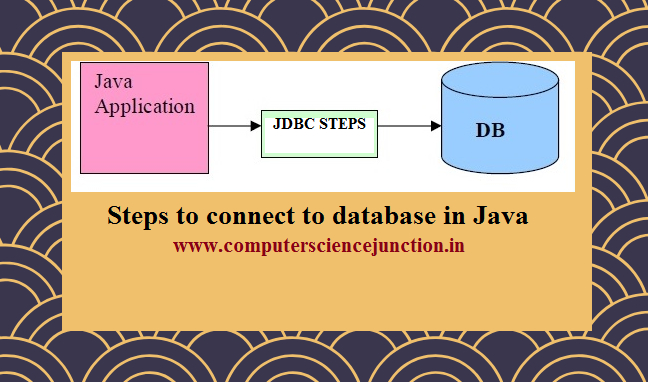
JDBC Connection Steps
JDBC Connection steps are used to connect the application program or Front end with Database in Java.
In the previous JDBC tutorial named as types of jdbc drivers in java we learned about what is JDBC in java and JDBC drivers in java .
In this JDBC tutorial we will learn how to create jdbc connection in java or java database connectivity with mysql or jdbc connection in java with oracle.
JDBC Connection Steps
There are 6 JDBC connection steps used to connect a java application with the database through JDBC.
These steps are as follows –
- Create an ODBC Data Source Name.
- Register the Driver class or load the jdbc drivers in java
- Create statement and execute query.
- Loop the result set until the data is available in table
- Free resources or Close connection
All these java database connectivity or jdbc drivers in java steps are explained here with their code .
Step 1 – Create an ODBC DSN (Data Source Name)
Step 2 – Load the JDBC drivers in java
In second step we have to load the Driver using JDBC ODBSC bridge. Following syntax is used in java to load the JDBC Driver.
Class.forName (“sun.jdbc.odbc.JdbcOdbcDriver”); //for JDBC-ODBC Bridge
Parameter passed in forName() method to connect with different database are as follows:
To connect with MySql – Class.forName (“org.gjt.mm.mysql.Driver”);
To Connect with Oracle – Class.forName (“oracle.jdbc.driver.OracleDriver”);
Connect with SQL Server- Class.forName (“com.microsoft.jdbc.sqlserver.SQLServerDriver”);
Step 3 – Create a Connection
Once the Driver has been loaded after that we need to established the connection using Connection Class object. The syntax is given below –
Connection conn = DriverManager.getConnection(“jdbcURL”,”username”,”password”);
here jdbcURL syntax is written as jdbc:odbc:dsnName
Where dsnName is the data source name that you have created earlier.
Note :- If you are not going through odbc then you have to provide the host string.
example –
For mysql database connection in java– jdbc:mysql://127.0.0.1:3306/student
For Oracle – jdbc:oracle:thin:@127.0.0.1:1521:student
For SQL Server –
jdbc:microsoft:sqlserver://127.0.0.1:1433;SelectMethod=Cursor;DatabaseName=student
Step 4 – Create a Statement for executing your database transactions.
Three types of statement can be used Statement, PreparedStatement and CallableStatement. Here we are explaining syntax for each type.
Java Syntax for all three types of Statement are given below –
Statement
Statement st = con.createStatement();
ResultSet rs = st.executeQuery(“select * from emp”);
int i = st.executeUpdate(“insert into college(name) values(‘ITS’)”);
PreparedStatement
PreparedStatement pst = con.preapareStatement(“select * from emp where name = ? and dept = ?”);
pst.setString(1,”sumit”);
pst.setString(2,”it”);
ResultSet rs = st.executeQuery();
CallableStatement
CallableStatement cstmt = con.prepareCall (“{call getDailyTotal (?, ?)}”);
cstmt.setString (1, “Mon”);
cstmt.registerOutParameter (2, java.sql.Types.INTEGER);
cstmt.executeUpdate();
System.out.println (“Total is ” + cstmt.getInt (2));
Step 5 – Loop the ResultSet for your results
The while will execute until the rows are found in the table record will retrieved from table and result will be displayed
while(rs.next())
{
System.out.println(“Emp Name is : ”+rs.getString(“name”));
}
Step 6 – Free the resources
In the last step we need to release the resource by invoking the close method on result object. The syntax is given below –
rs.close();
st.close();
con.close();
Difference between PreparedStatement and Statement
This is important to note that prepared statement java PreparedStatement is better as compare to Statement.
Some differences between prepared statement java PreparedStatement and Statement are explained here
In case of PreparedStatement it means prepared statement java query remains in the parsed form.
Generally SQL statements can belong to any one of the two categories: static or dynamic.
With a static query the string does not change you create it once then call it over and over again.
In contrast with a dynamic query you create a new SQL command by concatenating strings and variables after that instantiating a new Statement object and executing that command.
Either way each time we execute a new command the database must compile the SQL code.
This compilation can include various activities such as costly syntax checking, name validation, and pseudo code generation.
From the database performance point of view we should use prepared statement java PreparedStatement.
A PreparedStatement is provide the Java encapsulation of a parameterized query in which the SQL statement compiles a single time but it can execute many times.
If we want to change the query conditions then we employ placeholders (?) within the statement to indicate bind variables.
After such bind variables (parameters to the query) are set the query executes.
JDBC Connection Steps Example
In the following program we are connecting our application program to Database named CS1 through JDBC connection Steps.
All the jdbc conncetion steps explained above are implemented in this program
import java.sql.*;
class MysqlCon
{
public static void main(String args[])
{
try
{
Class.forName(“com.mysql.jdbc.Driver”);
Connection con = DriverManager.getConnection(“jdbc:mysql://localhost:3306/cs1″,”root”,”roo”);
//here cs1 is database name, root is username and password
Statement stmt=con.createStatement();
ResultSet rs = stmt.executeQuery(“select * from student”);
while(rs.next())
{
System.out.println( rs.getInt(1)+” “+ rs.getString(2) +” “+ rs.getString(3));
}
con.close();
}
catch(Exception e)
{
System.out.println(e);
}
}
}
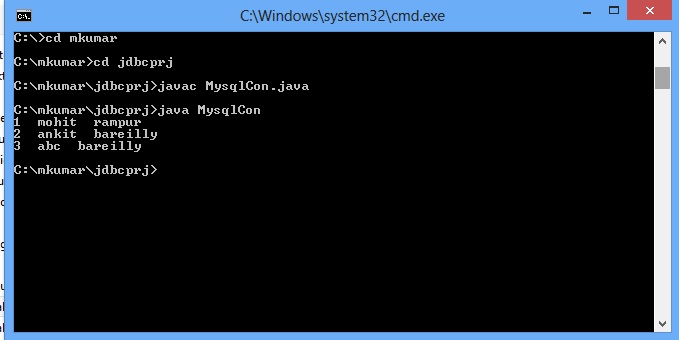
We are using the mysql as Database software . Database name is cs1 and we are displaying the all the data of student table in cs1 database.
when we run this program the output will be as shown in following picture.
Output
Related